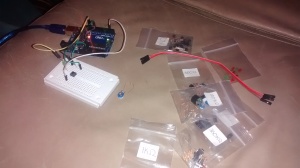
If they had this when I was studying electrical engineering, I never would have switched to civil.
Because making something blink has never been so exciting. This weekend, I decided to finally pull out my Arduino board and see what I can do with it…. and it turned out to be quite a bit of a rabbit hole! Down I went, and I am so excited about it.
For those that are unfamiliar, an Arduino board is basically a micro processor on a circuit board half the size of a postcard that has a number of input and output pins. You can then use those input an output pins to do things: take in a temperature, move a motor, blink an LED, etc. The beauty of the system is that the components are cheap and open source, and to get started the programming is super easy. The basic Arduino board is very simple: you provide it power (in different ways including from USB or up to 12v (recommended) directly to the Vin pin), and there are 14 digital I/O pins and 6 analog I/O pins, which you then control (either as output) or read (as input) through a program you upload called a ‘sketch’.
The basic package of Arduino kit:
One thing I love about the arduino environment is that the ‘overhead’ of the programming is extremely limited, and extremely logical. Every arduino code must have two functions:
void setup() {
}
void loop() {
}
The setup runs once, and the loop runs infinitely. That is it for the basics, and there is no fiddling to make sure that you have the right info in the header and that you need to include certain things in order for it just to function. You can then add your own functions (to be called from either setup or loop) by defining them, e.g.:
function newFunction(variables) {
}
and you can define global variables outside of the functions (so they do not exist just inside the functions), and #include various libraries that are helpful for what you are trying to do (e.g. move motors).
#include <stepper.h>
While you can choose various development environments, I figured the easiest was just the IDE that comes direct from Arduinio.cc:
I started very simply, going through the initial sketches on the learning section of the Arduino website. I basically used all the example sketches, loading the code and then wiring the board as needed, up until I needed to install the program Processing (in the middle of the communications section). I also modified the example codes as I went along to try to test out various concepts. I had great fun with the photoresister one, making myself a little “music” player (not saying it is great music.. more noise than music).
While I was learning, I discovered some key resources and I would be remiss to not list them here:
- Arduino main site learning tools and forum, where you can ask lots of questions and importantly learn from others questions
- Adafruit’s learning page, which has extremely helpful tutorials on different topics
- The references at Arduino wiki are helpful when you are trying to do a specific project, as someone my have already have gone through it before you, although the site design is a little … dated.
- I loved youtube channels Jeremy Blum (fabulous Arduino tutorials) and EEVblog (although the later is not just arduinos, but about electronics in general).
This is such a rabbit hole… time to keep learning!

